Cookie
Electronic Team, Inc. uses cookies to personalize your experience on our website. By continuing to use this site, you agree to our cookie policy. Click here to learn more.

How to Manage Multiple Google Drive Accounts

If you are a Google Drive user, perhaps you know the struggle of trying to maintain more than one account on the platform, especially if you have a Mac. The process is tedious and not intuitive at all, and switching between accounts is time-consuming. Fortunately enough, there are a few methods on how you can manage multiple accounts at ease, without losing precious time or using complicated software. Today we’re going to talk about methods and how you can use a multiple cloud storage manager to your advantage.


CloudMounter

Why use multiple Google Drive accounts?

The number one reason people use multiple google drive accounts is to benefit from more storage space. Every free account of Google Drive comes with a limited amount of space, thus, creating more accounts ensures that you have plenty of space for all of your files. Of course, there are other reasons such as managing business accounts or simply wanting to keep things private from your personal ones.

Another reason might be if you are using a shared account with multiple users. This way, you both get access to the files in an easy and convenient form.

Nevertheless, the advantages of having multiple google drive accounts cannot be denied, as they offer a free alternative to cloud space, in a convenient way, and a great way to manage types based on their respective categories.

How to have multiple Google Drive accounts on one Computer?


The traditional way of managing multiple google accounts would require users to use Google Chrome. This method will ensure that you can switch through accounts with a few clicks, and access your files on demand. Here are the steps you need to follow:

1

Make sure that you have Google Chrome installed

2

Add all of your Google accounts and make sure that you have Google Drive enabled for all of them

3

Go to Google Drive and on the top right corner click on the picture of your account

4

Click on any other account

5

You are now able to switch between accounts and take advantage of the files you need

Please note that while you are not able to move files between accounts, there is a workaround in which you can share the files between them. Simply click on the ‘Share’ button and enter the email address for the other accounts. This way, you will be able to enjoy two google drive folders on one computer and the ability to switch files between them without storing them twice.

Manage Multiple Google Drive Accounts with CloudMounter

CloudMounter

Price: $2999
Free version: Download
Mac App Store version: Available here

If you have been struggling with managing multiple google drive accounts, then you sure need to hear about CloudMounter. This powerful Mac application functions as both a cloud management solution and a mounting tool that will enhance your cloud experience and help you seamlessly transfer, copy, merge, clone, delete and download all of your files stored in the cloud.

Whether you have movies, videos, audio files, documents, or photos, you can upload and download anything with CloudMounter. When it comes to handling multiple drives, you can bring all of your accounts and this wonderful app will do the rest for you.

CloudMounter

Moreover, CloudMounter gives users true privacy due to the 256 advanced encryption that it’s using. This means that you can encrypt all of the files uploaded onto the cloud and make sure that nobody else can see them, even if your account is breached.

The mounting feature of CloudMounter makes it even easier to access your files. Simply click on the ‘Mount’ button and enjoy all of your files within seconds. With the integrated Finder feature, you can search for your files directly on your computer and access them as you please.

You will be thrilled to know that CloudMounter is also supporting popular cloud services such as Mega, Dropbox, Box, Backblaze B2, Amazon S3, and OneDrive. More than this, the mountain features works for all of these companies, as well as encryption and many more.

If you are looking to utilize CloudMounter for managing multiple Google Accounts, you can follow the steps below:

1

Download CloudMounter from the official website

2

Install CloudMounter and launch the application
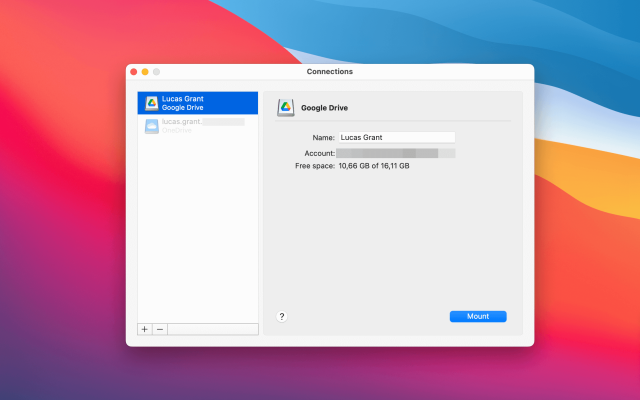

open CloudMounter
3

Log in with your Google Drive credentials
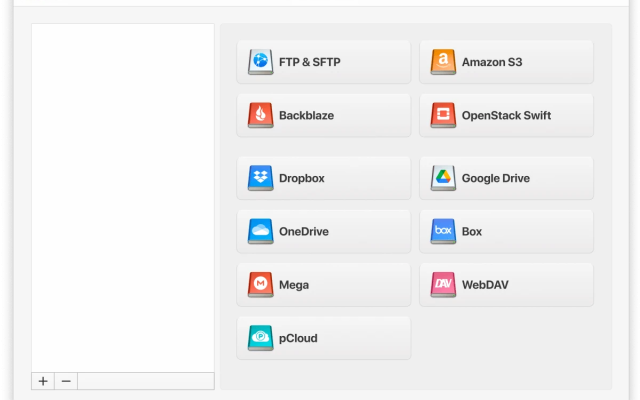

Connect your Google Drive
4

Make sure to add all of your accounts

5

Now go through each individual one and click on ‘Mount’

6
That’s it! Now all of your clouds will be mounted and you will gain access to them using the Finder

If you would like to change google drive account, you can do so from the main menu section, where you can toggle between them and delete as you please.

Conclusion

All in all, we can clearly see that there is no better solution than using CloudMounter. When you consider the addition of encryption, the easiness of use, and the fact that you can use it for multiple drives, it’s no surprise that CloudMounter takes the crown. Moreover, managing Google Drive accounts on your Mac has never been easier due to the Finder integration.

FAQ
Absolutely. You can have as many accounts as you have, and if you follow the steps above, you can manage them easily through Cloudmounter.
Google will let you create as many accounts as you want, but some restrictions or verifications might apply for creating a certain number of them. As long as you can verify your accounts and continue to create them, you should have no issues.
As long as you are using CloudMounter, you can switch between your accounts with the touch of a button. Simply go to the application, select the account you want and mount the drive. Now, you will be able to access all of the content directly on your Macbook.
Top choice

CloudMounter

  • Rank 4.8 based on 436+ users, Write a review
  • Requirements: Mac (Mac OS X) macOS 10.14+ 56.97MB of free space.
  • Version 4.5(1206). (). Release notes
  • Category: Utilities
Also available for Windows