Additional protection of online data
Dropbox
Amazon S3
FTP/SFTP
FTP client for Mac
Protocol support
As many FTP servers as needed
And since we’re talking about speed, you’ll be happy to learn that our software does not come with any sort of bandwidth restrictions. So, no matter the file size, you will always get the best transfer speed possible when using it! Rely on the best server manager and mounter to keep all your data under control.
Manage passwords with Keychain
Successful integration with Finder
Long list of improvements
How to Use CloudMounter to Mount an FTP Drive for Mac
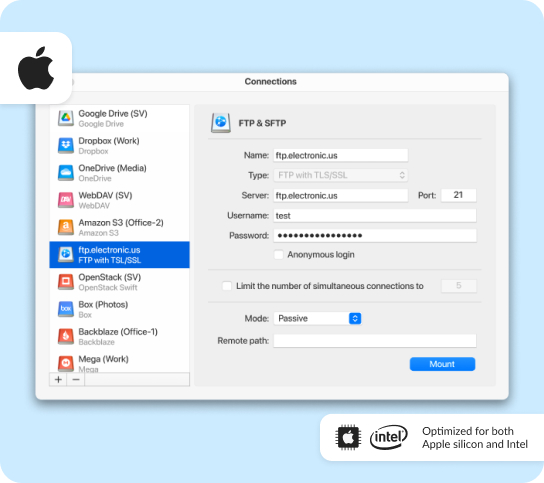
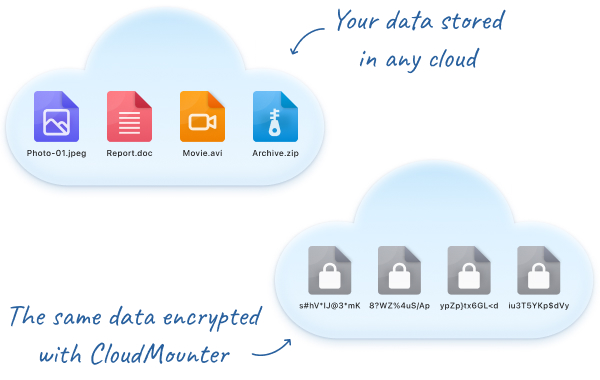
Using CloudMounter to mount an FTP server as a drive on a Mac is completely straightforward, and will allow users to simultaneously access multiple FTP servers at the same time if so desired. You can securely store login details like usernames and passwords in the macOS Keychain if you want to speed up access; otherwise, you’ll need to manually input the details every time you wish to log on to a server. For users who want to juggle files between multiple different cloud storage providers at once (e.g. Google Drive, Dropbox, OneDrive, etc.) CloudMounter lets you switch between different mounted drives through Finder so that you can stay in control of all your storage resources through a single interface. Just follow these steps to get the app up and running:
Download CloudMounter to your Mac device, then click on the app icon.
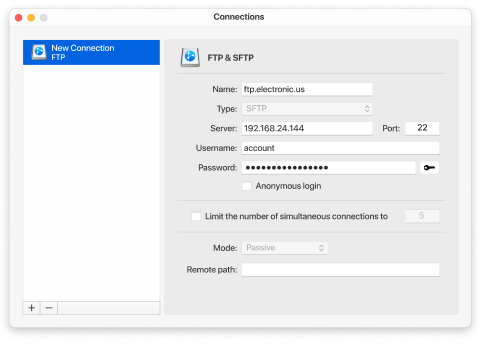
Enter the following details:
- Server name
- Connection type (FTP, FTP with TLS/SSL, FTP with Implicit SSL, SFTP)
- Server address
- Port value
- Login name and password
Select the connection mode (active or passive).
Select the remote path.
Click “Mount”.
You can store the login information in macOS Keychain and it will be used every time you establish a connection. If you leave the field blank, you will be asked to enter the password each time you connect to the server.
In fact, it is not necessary to install any special utility to connect to the server on Mac OS. Mac has a built-in client that is very easy to use. To open it, click “Go to” in the Finder panel. At the bottom of the expanded list, you will see the line “Connect to server”. After that, you can enter the connection address via ftp: // or the IP address where you want to connect to the server.
Click the "Connect" button below, after which you will need to enter your login information. Click “Connect”, and then you will be taken to the server file system. The most simple way is to use CloudMounter and mount FTP as a local drive.
FTP client is a program that allows you to connect to a remote server via FTP and also perform the necessary actions on it with elements of the file system. The client may be a browser, in the address bar of which you should enter an address that is a path to a specific directory or file on a remote server.
However, using a web browser in this context will only allow you to view or download the files of interest. In order to take full advantage of all the advantages of FTP, specialized paid or free FTP for Mac software should be used as a client.
Key differences between FTP and SFTP are the following:
- FTP does not provide any secure channel for transferring files between hosts, whereas SFTP provides a secure channel for transferring files between hosts on a network.
- FTP is short for File Transfer Protocol, while SFTP is short for Secure File Transfer Protocol.
- FTP is a service provided by TCP / IP. However, SFTP is part of the SSH protocol, which is information for remote login.
- FTP establishes a connection using a control connection on TCP port 21. On the other hand, SFTP transfers the file over a secure SSH connection between the client and the server.
- FTP transfers the password and data in plain text, while SFTP encrypts the data before sending it to another host.