How to Connect to an SFTP Server from Windows

Accessing the SFTP server in Windows requires accurate details needed for access. You will need the username, password (or private key), SFTP server link, and port to connect. Unfortunately, connecting via Windows can be challenging.

Since no native option exists, you’ll have to look at third-party options. Fortunately, these do exist. For example, CloudMounter lets you manage remote files directly through File Explorer; you don’t need an extra app. Today, you’ll learn how to connect to the SFTP server from Windows.

Is it possible to open SFTP in File Explorer

At the time of writing, you can’t access the SFTP server on Windows via a native method. As a result, you’ll need to look at third-party options. CloudMounter is the best choice for this.

When using CloudMounter, you can edit, copy, and rename files directly from File Explorer. Since you don’t need to learn how to use a new app, the process is seamless; you can get started right away. Moreover, you’ll always have access to your SFTP server once you’ve set up CloudMounter on your Windows device.

How to access the SFTP server via CloudMounter

While you can manage your files in File Explorer, you’ll first need to set up the server via CloudMounter. The app offers a comprehensive service and is very easy to use, and once it’s set up, you’re done. You can configure File Explorer to work with data from both remote servers and cloud storage tools you may use, such as OneDrive and Google Drive. 

Another advantage of CloudMounter is that you do not have any restrictions on the number of accounts you can use simultaneously from the same interface. To set up CloudMounter and access your SFTP servers, all you have to do is follow the instructions listed below.

1. Download and install the application on your Windows PC.

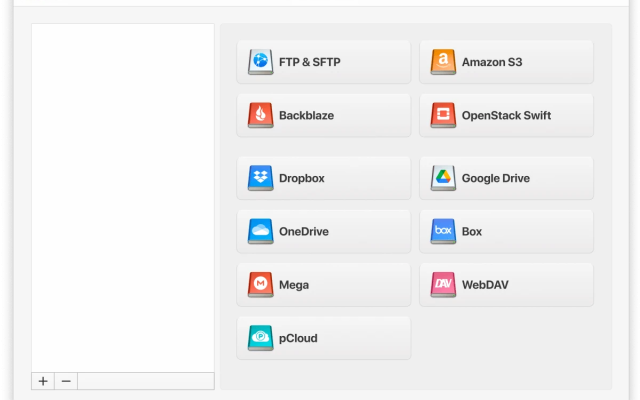
2. Run the CloudMounter app and choose the “FTP & SFTP” icon.

Selecting the SFTP connection in CloudMounter on Windows

3. Enter the following details:

  • connection type (SFTP);
  • server name, address, and port (it’s usually 22 for SFTP);
  • login and password (or private key);
  • remote path – the folder on the server you need to connect to (if you leave it blank, files will be uploaded to the default folder associated with your SFTP account).
SFTP setting in CloudMounter on Windows

4. Press “Mount”. Your SFTP server will appear in File Explorer, and you can work with your remote files.

SFTP as a drive in File Explorer

How else is CloudMounter helpful

To use this desktop app to its maximum potential, you should keep in mind the additional handy features that we’ve listed below. All of them contribute to an excellent in-app experience and comprehensive file management without extra additional setup.

  • Server management: Manage a diverse range of cloud storage and FTP/WebDAV remote servers, in addition to SFTP. 
  • No account limits: Use as many accounts as you need from across your cloud storage services. 
  • Integration: Work with all of your storage content within a single system file manager; no need to switch apps or open different tabs on your web browser. 
  • Security: Benefit from AES 256-bit encryption, which provides the maximum level of security for your remote files. 
  • Cross-Device Availability: CloudMounter is available on both Windows and macOS computers.

Conclusion

While it’s impossible to connect to SFTP server from Windows natively, you can still use this server in File Explorer with extra help. CloudMounter lets you quickly set up your server and start managing your files without too much hassle. 

In addition to connecting to your SFTP server, you can manage other types of cloud storage in the same app. Since it’s possible to keep everything within the same place, you can access all of your cloud storage through various accounts.