Knowing how to mount WebDAV on macOS is crucial if you want to remotely access your files from different web servers. However, doing so without additional help can be challenging. You’ll need to ensure that everything is secure, which is hard to verify without technical experience.
The good news is that alternatives exist – such as CloudMounter. Today, you’ll discover everything you need to know about mounting WebDAV servers on your Mac.
Add a WebDAV location to Finder
You can mount WebDAV natively on your computer. It’s possible to do this via the Finder app. Here are the steps you should follow to mount WebDAV in Finder:
1. Open the Finder app on your Mac and go to the toolbar at the top of your screen.
2. Click on “Go > Connect to Server”. Alternatively, use the hotkey “command ⌘ + K”.
3. A new window will then appear. When it does, enter the WebDAV URL in the Server Address text box.
4. Select “Connect”. If you are connected via https, you may need to click the “Continue” button when prompted to verify the certificate. This may be necessary if, for example, your WebDAV server has a self-signed certificate.
5. When the login/password prompt appears, select “Registered User”. Once you’ve done that, you will then need to enter your username and password.
6. Hit the “Connect” button. You should then fully be connected to the server.
After establishing a connection, you can upload, download, and edit files via the file manager. All you have to do is copy your file to the WebDAV folder if you wish to share it. Make sure that those receiving it have the level of permissions you want them to, so that they can access and edit everything.
Map remote server via WebDAV client for Mac
Regularly using WebDAV can get time-consuming and frustrating over time. You need to manually mount the folder each time you use it in Finder, for the most part. Some clients do this automatically, but it’s by no means universal.
Besides the lengthy connection processes, you could encounter other issues. For example, you need to allow HTTPS certificates in Finder if you have self-signed or expired it. To avoid such hassles and fully manage remote server files on your Mac, use CloudMounter’s desktop solution. Doing so allows you to work directly in the Finder without the same complications that would arise if you needed to do so manually.
This all-in-one cloud storage manager lets you mount WebDAV as a network drive. Once you’ve done this, you can organize your data and complete your file transfers more efficiently. It’s hassle-free, as you’ll discover when you start using it.
How to mount WebDAV as a drive with CloudMounter
CloudMounter lets you manage WebDAV files with ease, along with other file types. You can also keep everything within a single interface, which makes it very easy to organize your content.
To connect and use CloudMounter, follow the steps we’ve outlined below.
1. Download and install the program on your Mac desktop.
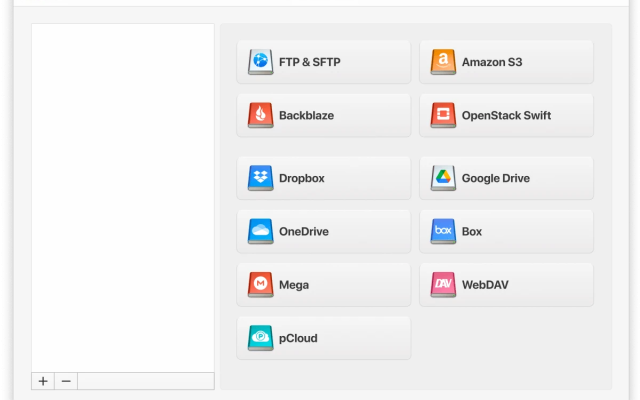
2. Open CloudMounter and choose the “WebDAV” icon.

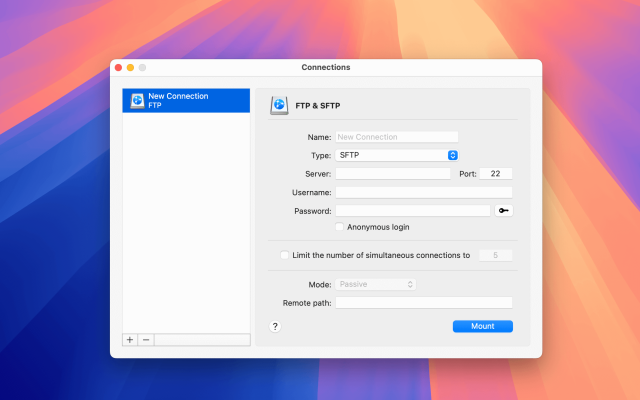
3. Enter the following details:
- connection name;
- WebDAV URL;
- username and password.
And allow an untrusted HTTPS certificate if required.

4. Tap on “Mount”, and WebDAV will show in Finder to manage your online files.

How else is CloudMounter useful
In addition to mounting WebDAV on your computer without having to continuously perform manual actions, CloudMounter offers many other benefits. It’s worth paying particular attention to each of these equally important features in the app:
- A diverse array of cloud storage and FTP or SFTP servers is available
- Oversee all your storage data collectively in one place
- As many accounts as you need
- Encryption, which offers further safeguarding for your online files
- Available for both Windows and macOS
- Ability to work offline.
Conclusion
Mounting WebDAV servers to Finder on macOS is generally quite straightforward. You can do so within Finder itself, though this method does have numerous drawbacks. For example, it’s very time-consuming and requires you to manually connect in most cases.
In addition to manually mounting your servers, you can use third-party tools like CloudMounter. Doing so makes managing your files and folders much easier, and you can connect to several servers simultaneously.