 CloudMounter
To optimize your CloudMounter caching settings, you need to balance local storage space with file transfer performance. Because CloudMounter creates local cache files on your computer whenever you open, edit, or copy files to your cloud drives, unoptimized settings can quickly fill up your local hard drive or cause slow performance.
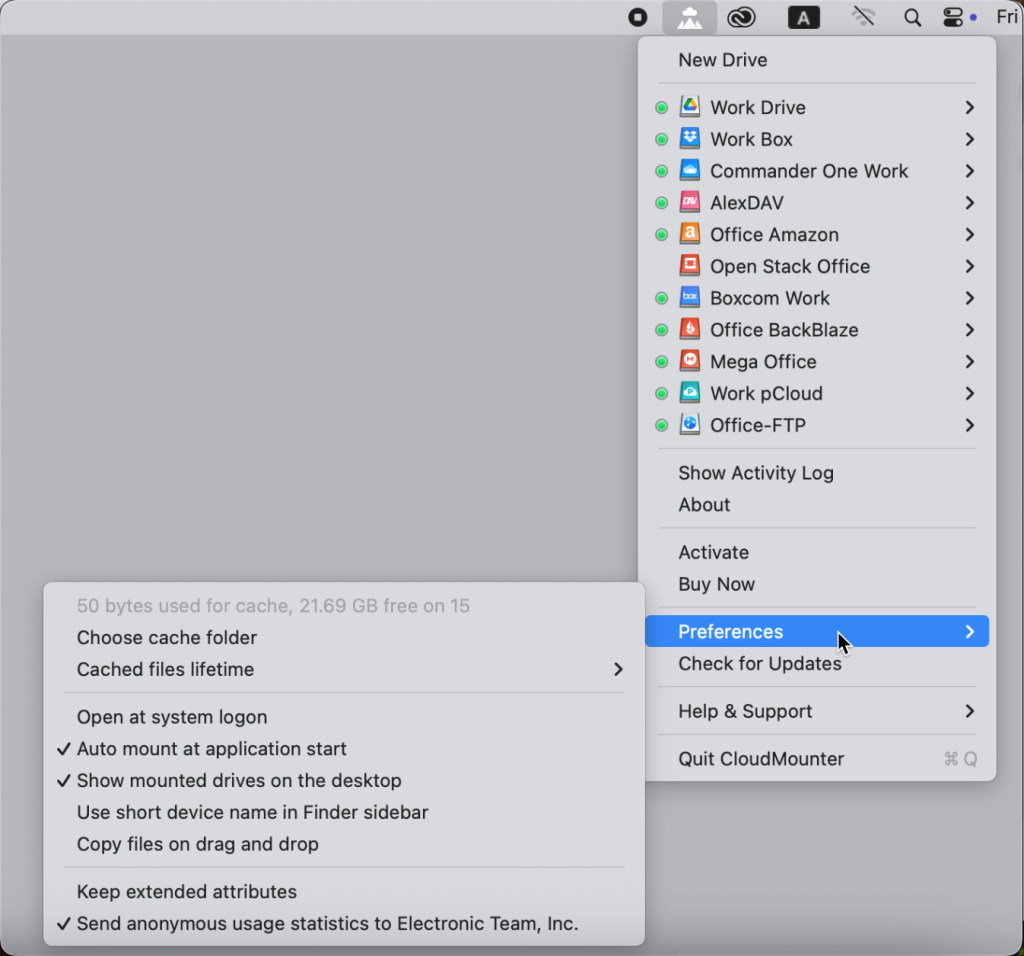
Key Cache Settings Explained
- Choose cache folder* – allows choosing a cache folder on a different disk. The above line displays the cache state for the chosen drive, where you can see the amount of space used by the cache and the storage capacity of the chosen drive.
- Сached files lifetime – cached files are automatically deleted when the time set in this option runs out.
- Keep extended attributes* – preserve extended attributes for all uploaded files. Extended attributes are textual name-value pairs that can be associated with files to describe them beyond what the standard filesystem attributes provide. They may be valuable for storing information such as, for instance, the author of a document or the tags or comments pertinent to a file. If this option is disabled, extended attributes on files will be cached and appear to work locally, but none of them will actually be persisted on the remote server. This option can be enabled/disabled for all types of connections.
Tip: For displaying and manipulating extended attributes on macOS, the xattr command is typically used.
- Change cache volume – lets you choose where CloudMounter stores cached data for your mounted cloud drives.